Administration
Dashboard
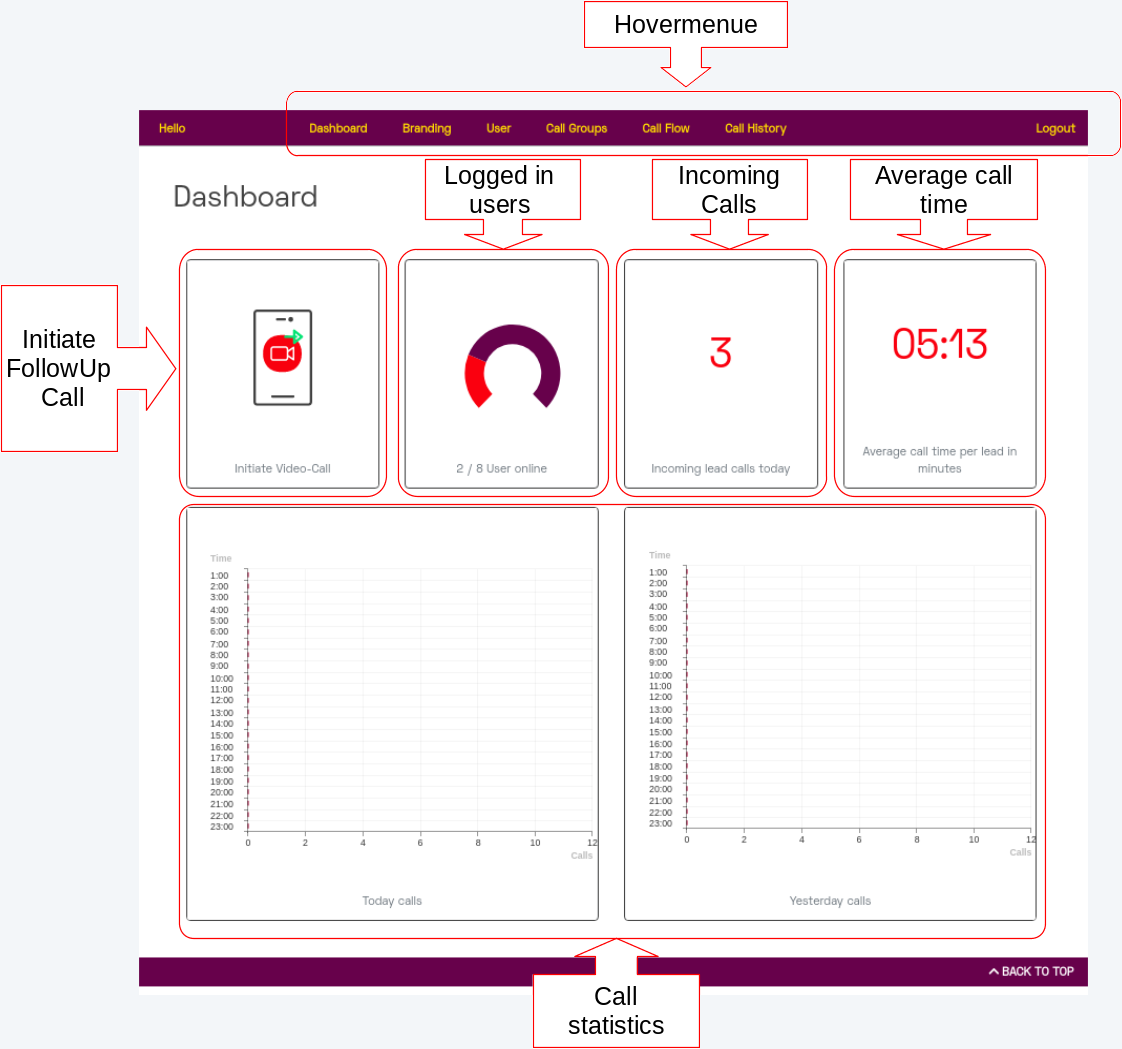
Hovermenu |
The hover menu leads to the other functions for managing dealers and users |
Followup Call |
Start a new call with a participant/user. |
Active User |
Number of all active backend users. |
Number of calls today |
Sum of all incoming calls today. |
Average call duration |
Average duration of all video calls of the day |
Call statistics |
Statistics on the number of incoming, accepted and unanswered calls in the last 48 hours |
FollowUp Call
To start an outgoing video call there is the function of the “FollowUp Call”. A user can use this function to start a new video call from the backend and invite people. The invited people do not need a user account in the backend. Additional users can either bei invited via an email or a short message (SMS) to a video call.
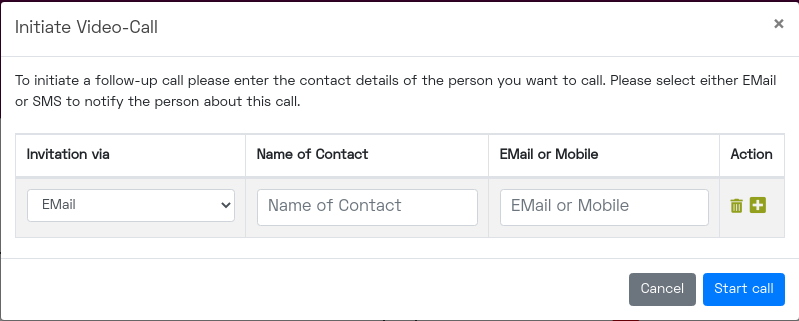
Invitation via |
How the invitation link to the upcoming call should be sent to the participant. An invitation message with an access link can currently be sent by short message (SMS) or email. |
Name of Contact |
Name of the participant to be invited. This text is also used as the user name in the video call. |
Email or Mobile |
Email address or mobile phone number for short messages (SMS) to send the participant the access link. |
Action |
Additional participants can be added to a call using the plus symbol. Individual users can be removed from the list using the trash can icon. |
By clicking on the “Start Call” button, the user is directed to a video call. The other invited participants will receive automatic notifications with a link to participate.
Tip
There is no way to trace whether the invitation link has been received and read. We therefore recommend that you only use this function after direct consultation with the participant (s), so that a video call is also possible from both sides.
Branding
In order to adapt the application to the user as much as possible, various items are available in the “Branding” menu. If one of these points is not filled in, the standard settings of the system apply.
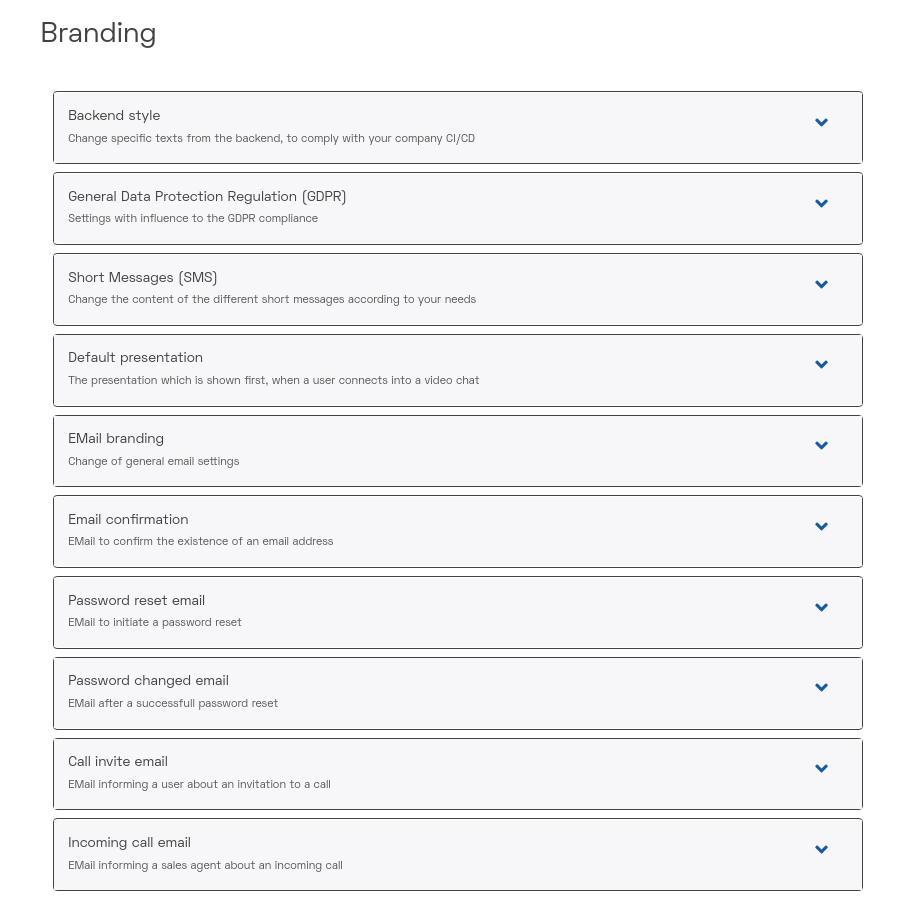
Backend style
The following points can be freely defined in the backend style.
Links in the head area (right above the hover menu)
Here you can set links to important websites (e.g. a content management system, calendar, documentation wiki and / or the homepage in HTML syntax).
Text in the footer area (links below the text content)
Plain text for individual design.
Privacy policy link
Link to the privacy policy. Will automatically be added to the welcome message of the video call.
GDPR Notice
In order to give the participants the possibility to inform themselves about the processed data of vidzzle.com before accepting calls via the followup function on the dashboard, a notice - matching the local data protection laws - can be created and displayed here. By checking the box, this message will be activated for all outgoing calls and displayed to the called party before each call. For incoming calls, the embedded code must be adapted according to the instructions.
Short messages (SMS)
The texts of the short messages (SMS) can be adapted as required. Multimedia short messages (MMS) cannot be sent via the system, so only plain text messages without formatting are possible. Likewise, no HTML knowledge is required to adapt.
Text for call invitation via short message
The text of the call invitation should not be too long to avoid denominations by sending SMS. A simple SMS can only contain 160 characters, which includes the automatically attached link. Depending on the length of this link, a few characters are available. It is not possible to use keywords in this function.
Text for notification of an incoming call
Default presentation
A presentation can be uploaded via the standard presentation, which is displayed as the first page in the video call. The accepting user can then change the presentation at any time in the ongoing video call.
Email Branding
Email branding includes individual settings that can be made for the basic form of all outgoing emails in the backend. The following settings are possible:
EMail sender address |
Sender address of every email from the system. Overwrites individual senders per user to pass spam filters if necessary. |
Header image |
An image (png, gif or jpg format) with the size of 600x102 pixels. This serves as the header of every email from the system. |
Hero shot |
An image (png, gif or jpg format) with the size of 600x300 pixels. This serves as the central image in every email sent. |
EMail signature |
A signature that is placed under all emails. Can e.g. be used to meet legal requirements in all emails. |
The following variables can be used for the email signature.
__DEALER_NAME__ |
Name of the Dealer |
__DEALER_STREET__ |
Street |
__DEALER_ZIP__ |
ZIP |
__DEALER_CITY__ |
City |
__DEALER_EMAIL__ |
EMail address |
The content of the available variables is based on the support given data. Therefore, these can only be changed by support.
Email confirmation
Here individual adjustments to the subject, content and form of the so-called opt-in mail of a new user can be made. The variables that are used for the mail content cannot be used in the subject. HTML formatting in the subject is also not possible.
__RECIPIENT_NAME__ |
Name of the email recipient. |
__APPNAME__ |
Global name for the video call backend, can only be changed by the support and cannot be customized |
__LINK__ |
Opt-in link generated by the system for single use. It is required to use this variable in the email confirmation, because without the generated link it is not possible to confirm the email address. |
__SENDER_NAME__ |
Name of the sender. |
__DEALER_COMPANY_NAME__ |
Dealer name. This is the same variable that is in the email branding under __DEALER_NAME__. |
Passwort change email
Individual adjustments to the subject, content and form of the email can be made here, which is sent when a user wants to set a new password. The variables that are used for the mail content cannot be used in the subject. HTML formatting in the subject is also not possible.
__RECIPIENT_NAME__ |
Name of the email recipient. |
__APPNAME__ |
Global name for the video call backend, can only be changed by the support and cannot be customized |
__LINK__ |
Link generated by the system for single use. It is required to use this variable, as it is not possible to change the password without the generated link. |
__SENDER_NAME__ |
Name of the sender. |
__DEALER_COMPANY_NAME__ |
Dealer name. This is the same variable that is in the email branding under __DEALER_NAME__. |
EMail after password change
Here you can make individual adjustments to the subject, content and form of the email that is sent after a user has set a new password. The variables that are used for the mail content cannot be used in the subject. HTML formatting in the subject is also not possible.
__RECIPIENT_NAME__ |
Name of the email recipient. |
__RECIPIENT_EMAIL__ |
EMail address of the recipient. |
__APPNAME__ |
Global name for the video call backend, can only be changed by the support and cannot be customized |
__SENDER_NAME__ |
Name of the sender. |
__DEALER_COMPANY_NAME__ |
Dealer name. This is the same variable that is in the email branding under __DEALER_NAME__. |
Email to invite to a call
Here you can make individual adjustments to the subject, content and form of the email that is sent when a participant is invited to a new video call. The variables that are used for the mail content cannot be used in the subject. HTML formatting in the subject is also not possible.
__RECIPIENT_NAME__ |
Name of the email recipient. |
__LINK__ |
Link generated by the system for single use. It is required to use this variable, because without the generated link, participation in the video call is not possible. |
__SENDER_NAME__ |
Name of the sender. |
__DEALER_COMPANY_NAME__ |
Dealer name. This is the same variable that is in the email branding under __DEALER_NAME__. |
Call-notification email
Here you can make individual adjustments to the subject, content and form of the email that is sent when a new video call arrives. The variables that are used for the mail content cannot be used in the subject. HTML formatting in the subject is also not possible.
__RECIPIENT_NAME__ |
Name of the email recipient. |
__LINK__ |
Link generated by the system for single use. It is required to use this variable, because without the generated link, participation in the video call is not possible. |
__SENDER_NAME__ |
Name of the sender. |
__DEALER_COMPANY_NAME__ |
Dealer name. This is the same variable that is in the email branding under __DEALER_NAME__. |
Webhooks
Webhooks can be used to inform your internal applications (for example a CRM System) about the start and end of a video call. We currently provide hooks for the “Start Call” and “End Call” event and provide the same set of information for both events. Please be aware, that the “End Call” Event might have more or updated information in comparison to the “Start Call” Event. You should consider using the “End Call” event to update the data from the “Start Call” Event.
The call data is posted to the url you store in the corresponding fields. If you need additional header, for example to authenticate the callback, you can add them into the ‘Additional header” fields. Please put one header per line and separate the header name from the header value by a : and a space.
The following data is posted as json string to the url.
callid |
Unique UUID of the call |
start |
Date and Time of call start formatted as ISO 8601. Empty if unknown. |
end |
Date and Time of call end formatted as ISO 8601 Empty if unknown. |
callflow |
ID of the callflow triggered by the user. |
userid |
Numeric userid of the user who answered the call. |
username |
Username (normally the email) of the user who answered the call. |
Attention
Currently we only provide the webhooks for incoming calls.
User
A so-called “Administrator” (see User classes) must be set up before using vidzzle.com. This is done via support.
In the “User” area, the administrator is shown the individual users.
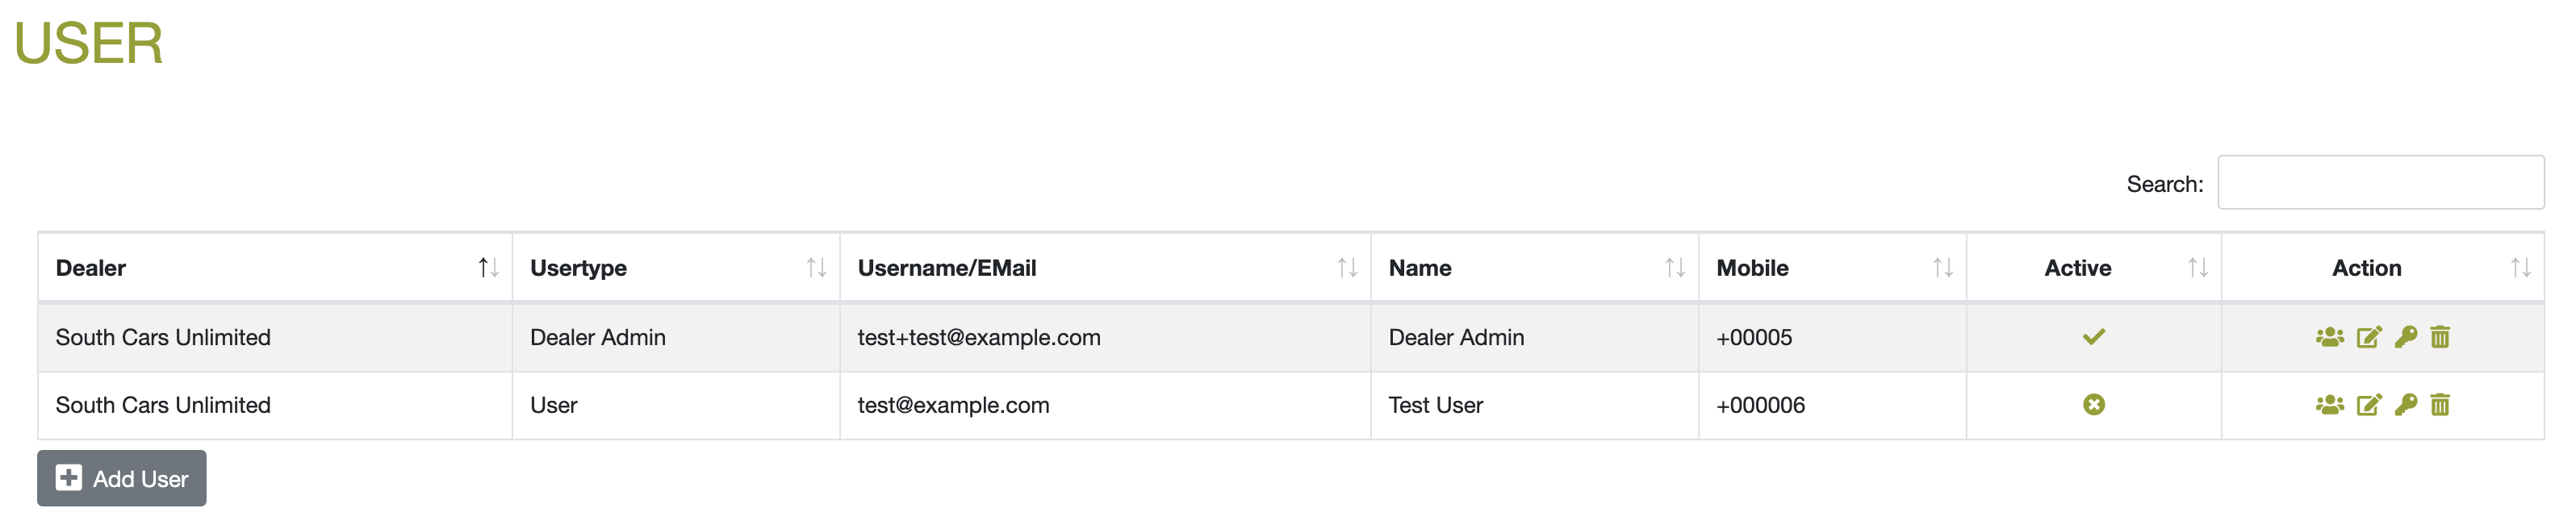
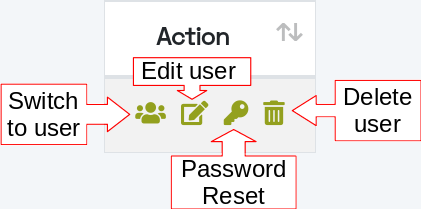
A new user can be created using the “Add User” button below the overview table. Further user-specific actions can be carried out via the “Action” column within the table. These are as follows:
Create user
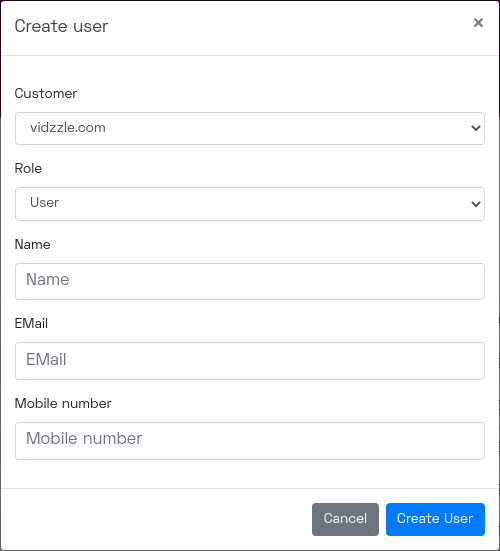
All fields in the mask are mandatory and are used within the application, for example to adapt the branding for the corresponding user. After clicking the “Save” button, the data is transmitted to the backend, checked and saved. If there is an error, a corresponding error message is generated and displayed in the frontend. The error can then be rectified and the desired action started again.
After successful storage, the user account is automatically blocked. To unlock the user, an automated email is sent to the specified email address. This email contains a link that the user must use to log on to the system for the first time. When logging in for the first time, the user must also set a personal password for their account. (see Login)
Edit user
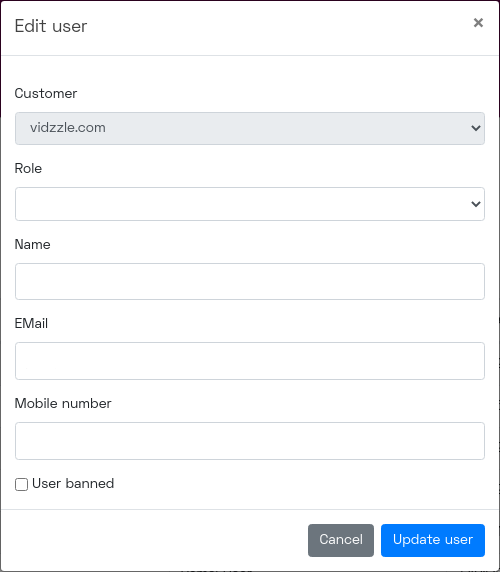
All fields in the mask are mandatory and are used within the application, for example to adapt the branding for the corresponding user. After clicking the “Save” button, the data is transmitted to the backend, checked and saved. If there is an error, a corresponding error message is generated and displayed in the frontend. The error can then be rectified and the desired action started again.
The “Dealer” field cannot be edited. A user can be prevented from logging in to the application via the “User blocked” field. However, this setting only takes effect the next time the user logs on to the system. There is no forced logout.
Delete user
After a security question, the user including all of his statistics and settings is deleted from the system. This deletion is irrevocable and cannot be undone by system support.
Switch user
The “Change user” function enables an administrator to switch to the account of a subordinate user. If this function is carried out, the system directs the administrator to the new user’s dashboard. To identify such a session, the name of the administrator (in the top left next to the menu) and the name of the administrator appear in brackets.
To end the function, the administrator must press the logout button (top right next to the menu) once. He is then back on his own user’s dashboard.
Hint
Do not use multiple windows or tabs in your browser for this function. This could lead to unexpected problems.
Reset password
Unfortunately, it happens regularly that users forget the passwords for an application. An administrator can use this function to trigger a new password. An email with a link is sent to the user, which the user must click. He will then be redirected to a website where he can set a new password.
This function is identical to the first setting of a password. (see Login)
Call Groups
Call groups are used to group users with identical areas of responsibility or focus in sales. This makes it possible to route incoming video calls to the responsible employees.
Hint
At least one call group is required to receive incoming video calls.

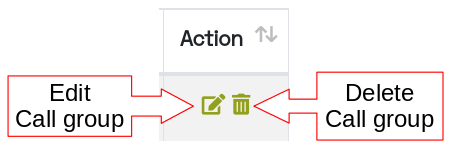
A new call group can be created using the “Add Call Group” button below the overview table. Further call group-specific actions can be carried out via the “Action” column in the table. These are as follows:
Create call group
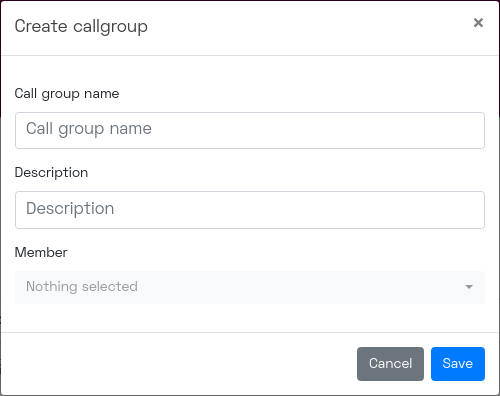
Only the “Call Group Name” field is a mandatory field, all other fields can also be filled in at a later date. The “Members” field is automatically filled with a list of users of the current dealer / location. Any number of users can be added to a call group from this list.
Edit call group
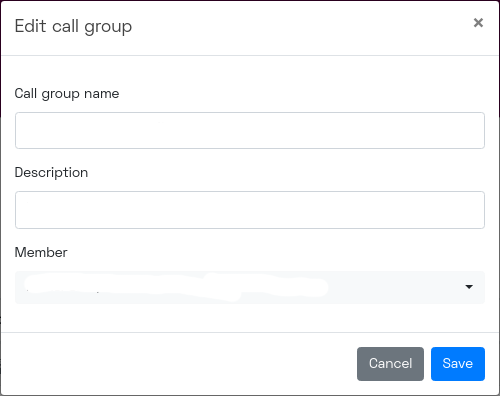
Only the “Call Group Name” field is a mandatory field, all other fields can also be filled in at a later date. The “Members” field is automatically filled with a list of users of the current dealer / location. Any number of users can be added to or removed from a call group from this list.
Delete call group
After a confirmation prompt, the call group is deleted from the system. This deletion is irrevocable and cannot be undone by system support.
Call Flow
A call flow describes the various options that can influence the behavior of an incoming video call. There are three groups of settings that primarily affect a corresponding call:
Day of the week and time
Call recipient
Escalation level of the call
After a call flow has been successfully created, it appears in the overview table and is automatically assigned an “embed ID” by the system. With this, the call flow can then be connected to a button or other Call 2 Action on the homepage. See also the chapter Embedding

A new call flow can be created using the “Add Call Flow” button below the overview table. Further specific actions can be carried out via the “Action” column within the table. These are as follows:
Create a new call flow
In order to keep the creation of a call flow as simple as possible, but to allow maximum flexibility, a wizard guides the user through the individual steps. After each step, it is automatically checked whether the settings made are correct or whether changes by the user appear necessary.
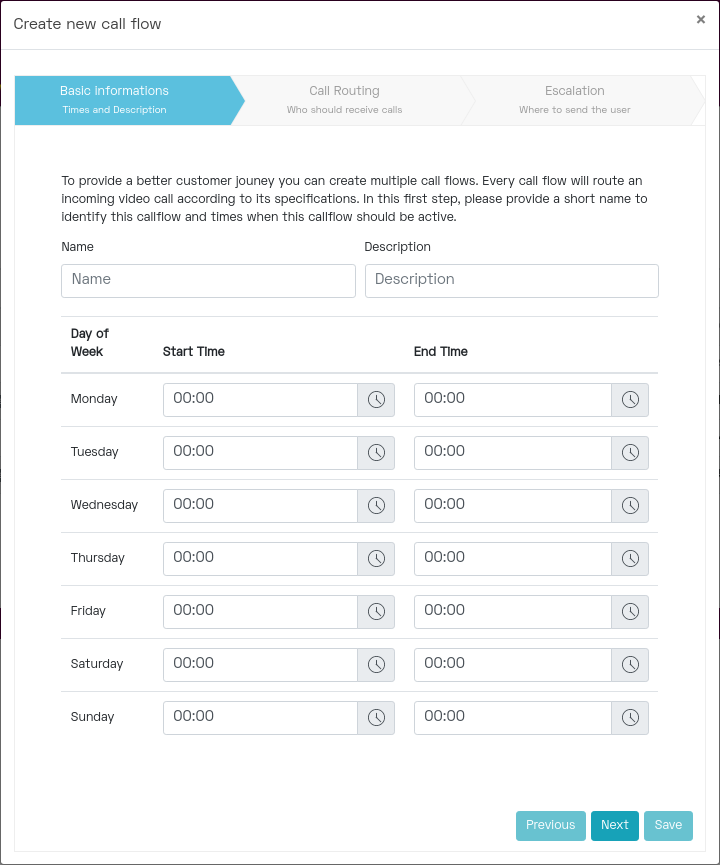
In the first step of the wizard, in addition to a name and a description for the call flow, the days and times at which the call flow should be active are queried. Outside of these times, the user is redirected to a website, which is queried in step 3 of the assistant.
If a call flow is not to be active on a certain day, the start and end times must be set to the same time.

In the second step of the wizard, the actual call routing must be defined. The system always goes from top to bottom. I.e. First, the users in the first line are notified if the video call is not accepted within the time specified in the Ringtime field, then the next call group is notified. If the system has reached the end of the list and the video call was not accepted by anyone, the participant will be redirected to the escalation URL, which is specified in step 3.
Attention
The ring times of the individual steps add up. Customers should not be kept waiting too long, otherwise they may jump off.
Hint
The maximum sum of all ring times in a call flow is 240 seconds.
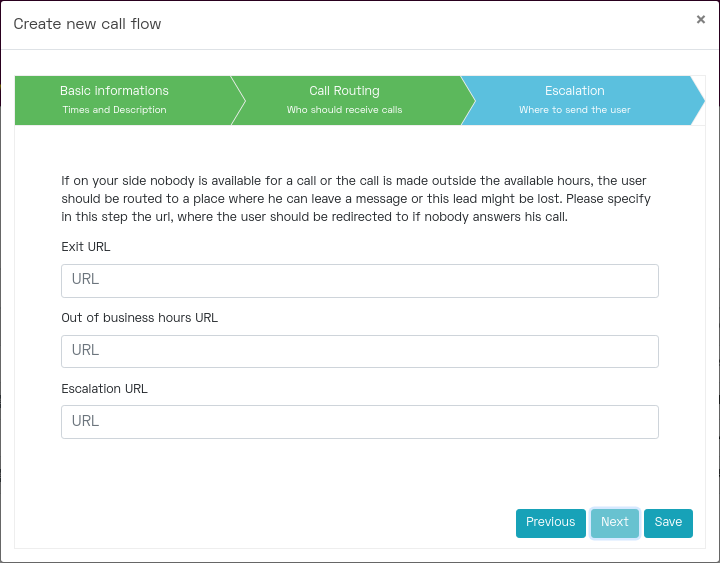
In the third step, 3 different URLs must be specified, to which the participant is redirected in certain cases. In detail, these are the following URLs:
Exit URL |
The participant will be redirected to this URL after the video call has ended successfully. |
Out of business hours URL |
If a call is made outside of the times from step 1, the participant will be forwarded to this URL. |
Escalation URL |
If, despite all efforts, a video call cannot be accepted by an employee, the participant will be directed to this address. |
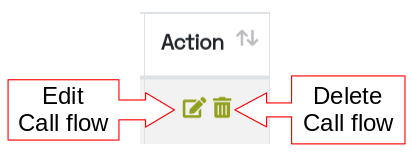
Edit a call flow
You can edit a call flow at any time to adjust all settings. You will be guided through the same wizard as when creating a new call flow. The same rules and restrictions apply here.
Delete Call Flow
After a confirmation prompt, the call flow including all of its settings is deleted from the system. This deletion is irrevocable and cannot be undone by system support.
Attention
This also invalidates the integration on the website which may have to be deleted or adapted by the web designer.
Embed
In order to give the designer of a homepage the maximum flexibility for integration into the homepage , the integration takes place in two simple steps. First, a JavaScript source file must be included in the page header before a button or Call 2 Action is used as a trigger for the call in a second step.
JavaScript source
The following line must be included in the header of the HTML page on which a video call is to be triggered.
<script type="text/javascript" src="https://app.vidzzle.com/embed.js"></script>
Button / Call 2 Action
In a second step, an HTML element must be selected as the trigger for the call. This can be any element that a user can click on. The design is entirely up to the designer of the website. However, it is important that two properties are assigned to the element.
id=’btn-cwbbb-osr’
data-cwbbb-igh=’<EMBED-ID>’
data-cwbbb-name=’<NAME>’ (optional)
The ID of the element is fixed and cannot be changed. You can find the value for the Embed ID in the backend on the page Call Flow.
More element properties can be used to control the further processing of the call. The following properties are currently supported:
data-cwbbb-name |
Default: Customer The name of the caller to be shown in the backend. Can for example be taken from a contact form or existing session data. |
data-cwbbb-gdpr |
Default: 0 If this value is set to 1, every incoming caller will get a privacy notice displayed before the call can start. The caller will receive one notice for every new callflow he triggers and if the caller agrees to the notice the agreement will be stored for 14 days in a cookie. |